


Get Bold Guides You Through the Process of Preparing Your Artwork for Custom T-Shirt Printing
At some point, you are faced with the task of sizing and placing your design on multiple sized t-shirts. Let GetBold help you prepare your artwork. Our experienced staff can make it a lot easier for you.
How can your design look perfect on every size shirt, not to mention sizing and locating the artwork for different styles? A good rule is to allow 5 to 8 inches on either side of a design to make it look right. However, the type of shirt affects the final design. For instance, crew necks affect the vertical placement of the artwork.
The Colour of the Shirt is a Big Part of Your Design
Obviously printing a dark colour on a dark shirt will make your design difficult to see or read, so make sure there is enough contrast by placing your artwork on the shirt colour ahead of time to make sure the design stands out and that it is readable. Some brightly or boldly coloured designs may look better on more neutral or “greyed” coloured shirts. Other designs benefit from a brightly coloured shirt, for instance, you may try one colour or a dark grey to black design. Gender or age group can also be a factor when selecting a shirt colour.
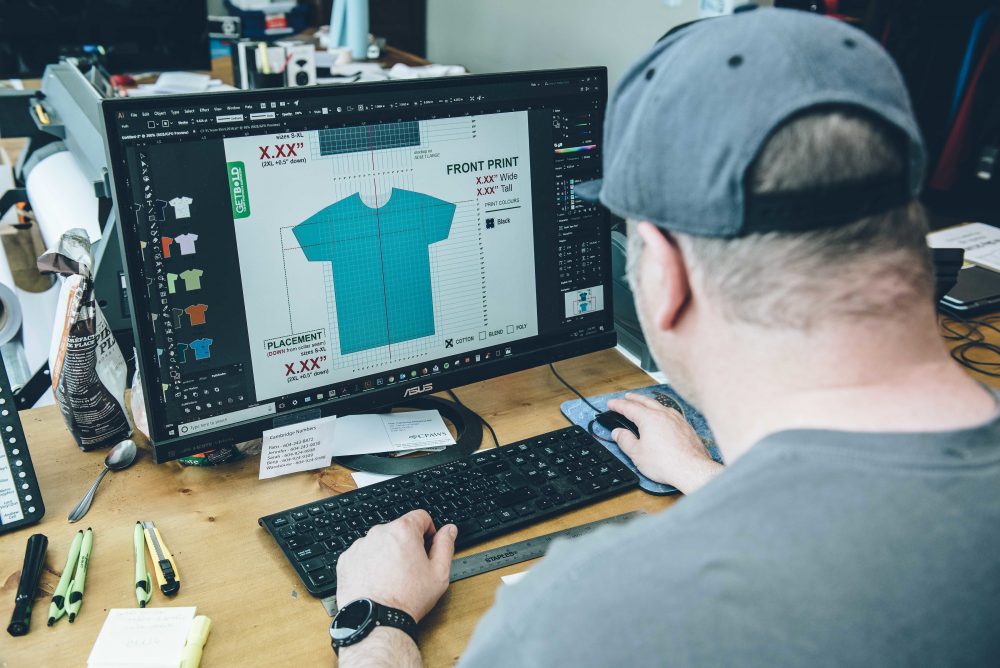
Screen Printing Preparation
A standard measurement of a full front design for an adult shirt is 12” wide by 13.5” tall. Although it is possible to print a design that is as large as 16” wide by 20” tall, this requires very critical consideration of the style and size limitations of the garment. A standard size design for a youth shirt is 9” wide by 12” tall. And a standard size design for a toddler shirt is 6” by 6”. A good standard rule is to keep your design at least 2” below the collar. There are also guidelines and templates you can reference for other areas of the shirt like Left Chest, Right Chest, Above Pocket, Full Back, Tag Print, and Sleeves. Your printer should provide a template you can follow. Your artwork should be sized to the final print dimensions and 300 dots per inch or as a vector.
If yo are sending your art as a vector, you should convert fonts to “outline” . This will make sure your font doesn’t have to be recognized. “Outlining” your text converts it into universal graphic artwork. Then, the final file can be saved as a PDF.
Embroidery templates are a great guide and can be opened in Adobe Illustrator. In addition to colour selections that correlate to the embroidery thread colours, the template will provide height and depth limitations. As with screen printing preparation, and all file preparation, make sure to “outline” your text.
Applique artwork sizes and placement follow the basic sizing and placement rules of the embroidery template, although typically the size is bigger with applique. Adding areas of other fabric requires creating a design outline of the fabric and then applied to the fabric and sewn in with along with the embroidery work.
With help from GetBold, making sure your design is the correct size and is placed just right, will ensure you end up with a professional result. Sometimes proper placement isn’t just esthetically pleasing, it is a regulatory requirement. This is true of sport team jerseys. Adhering to these rules avoids a costly mistake and very well could determine or have a large effect on becoming a reliable source. We are ready to help you any step of the way. If you want to speak to us directly, you can either conference us on your computer or visit us. We’re in Vancouver BC, so if it is convenient for you, we’d love to meet you.